David Gaspard
Tech through David's lenses.
How To Create A Dotnet Core Docker WebAPI - Angular Dotnet WebApp Lesson 1
Creating a containerized dotnet core web API
Microservices serve as the core building blocks of any modern web application. Developing your application as a mesh of interacting web APIs with very specific responsibilities allows for greater scalability, independence between services and developers, and heterogeneity between stacks best suited for different tasks. The separation between web APIs and your web application UI is so that you can reuse the web APIs across multiple UIs, such as as web, Android, and iPhone.
A container is a standard unit of software that packages up code and all its dependencies so the application runs quickly and reliably from one computing environment to another. A Docker container image is a lightweight, standalone, executable package of software that includes everything needed to run an application: code, runtime, system tools, system libraries and settings.
This tutorial will teach you how to build a dotnet web API and create a docker container image for the service
Prerequisites
- Visual Studio Code for development
- Basic programming/website knowledge (not algorithmic)
- Some basic C# experience to create the Webapi (backend)
- Dotnet core and dotnet CLI
- Docker to containerize the web application. Just trust me on this one
- Postman to test the webapi
- Google chrome or Microsoft edge chromium
1. Creating a new dotnetcore webapi
After you’ve downloaded and installed all of the dependencies above, open your terminal or command prompt and create a new folder or git repository for your web application wherever you would like. For this example, I will be creating a new folder called a kubcourse and scaffolding a new webapi project using the dotnet CLI
1
2
3
4
cd ~
mkdir kubcourse
cd kubcourse
dotnet new webapi -o webapi --no-https

The dotnet command above creates a new dotnetcore webapi project and the -o webapi option directs the CLI to output the code into a project called webapi. We use the --no-https option to make sure that we do not use RSA encryption. We will allow the Kubernetes cluster to manage HTTPS later in this tutorial.
Once the webapi project is created, you can open visual studio code to begin developing and running the webapi
1
2
cd webapi
code .
This should bring up visual studio code. Once VSCode is up, you should be able to easily start the project by going to going to the debug window and starting the debugger.
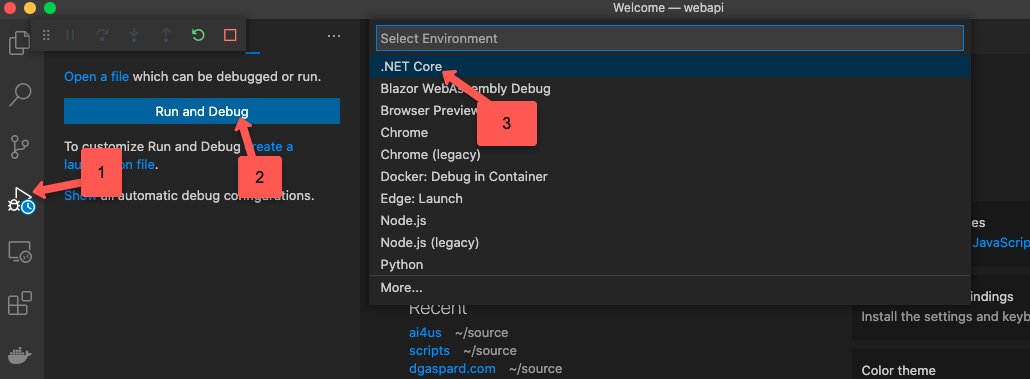
If all is successful, a new browser window should have opened displaying a dummy json data in the browser.
If you are getting a 404 error in the browser, it may be that the browser defaulted to open the root location of the webAPI. At the time of writing this article using dotnetcore 5, newly created webapi projects came with only one endpoint/controller, which was the /weatherforecast endpoint. If so, navigate to the /weatherforecast path like so.

Congratulations, you have sucessfully created your first WebAPI!
2. Dockerizing your new application
Once you’ve installed docker on your machine, in order to dockerize your web application, you will need to install the docker VSCode extension. You can do this by going to the extensions menu in VSCode and searching for and installing the docker extension.
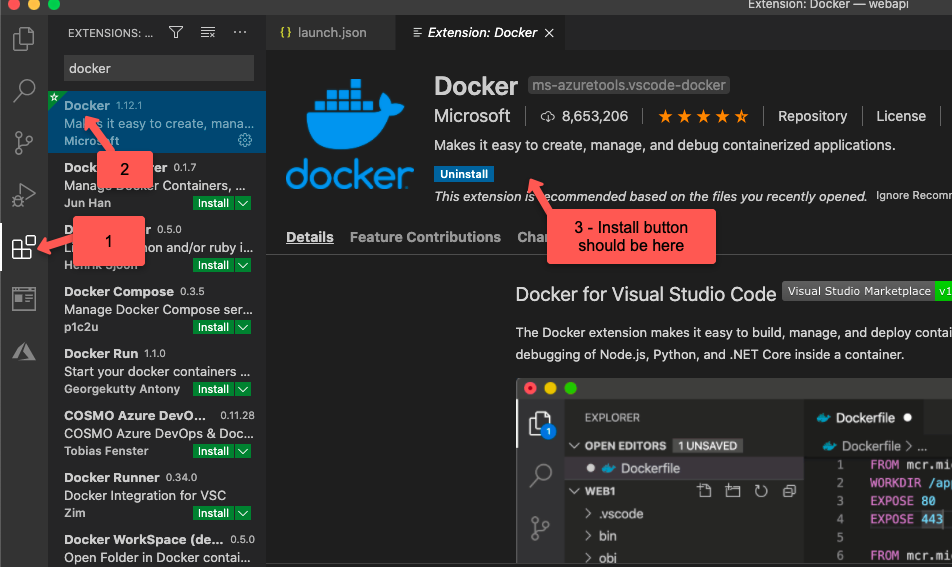
After installing the VSCode docker extension, go back to the file explorer in VSCode to create the necessary docker artifacts by opening the command palette in VSCode by using ctrl+shift+p in Windows or ⇧⌘P in Mac and searching for Docker: Add Docker Files to Workspace
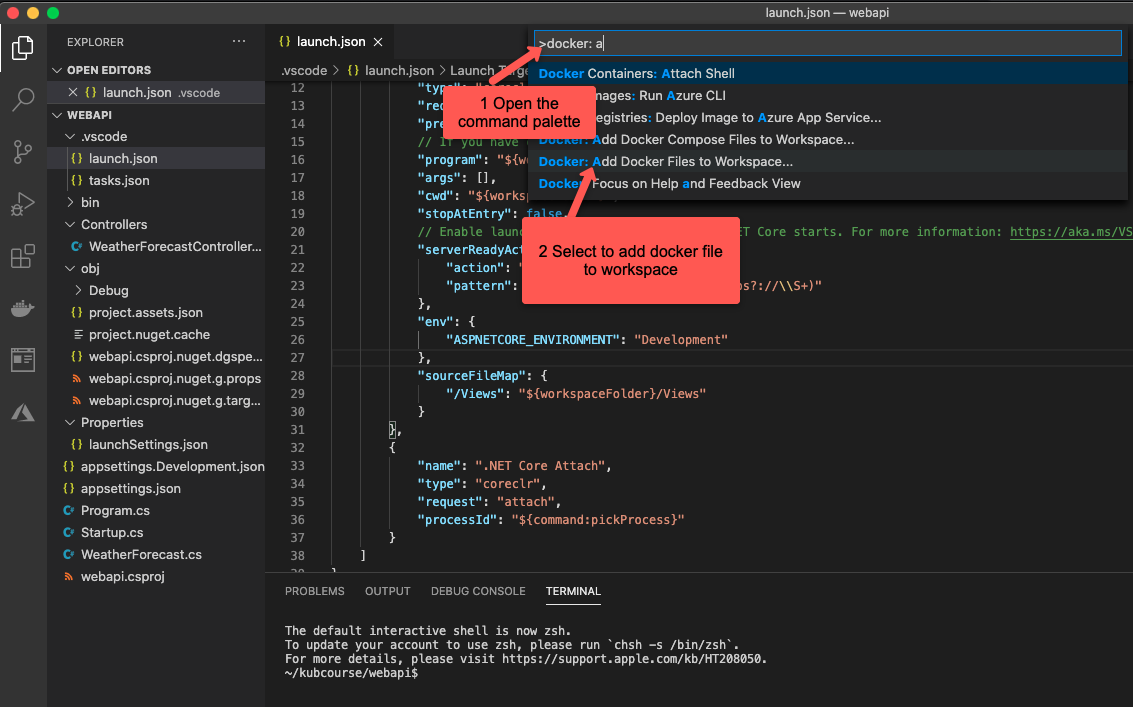
For the options that come up, select to use -ASP.netcore -Linux OS -Port 5000 (or whatever you prefer) -Do not include optional compose files
You should see a new ‘Dockerfile’ file get added to your workspace. It should resemble the docker file below.
1
2
3
4
5
6
7
8
9
10
11
12
13
14
15
16
17
18
19
20
21
22
23
24
25
26
27
FROM mcr.microsoft.com/dotnet/aspnet:5.0 AS base
WORKDIR /app
EXPOSE 5000

ENV ASPNETCORE_URLS=http://+:5000

# Creates a non-root user with an explicit UID and adds permission to access the /app folder
# For more info, please refer to https://aka.ms/vscode-docker-dotnet-configure-containers
RUN adduser -u 5678 --disabled-password --gecos "" appuser && chown -R appuser /app
USER appuser

FROM mcr.microsoft.com/dotnet/sdk:5.0 AS build
WORKDIR /src
COPY ["webapi.csproj", "./"]
RUN dotnet restore "webapi.csproj"
COPY . .
WORKDIR "/src/."
RUN dotnet build "webapi.csproj" -c Release -o /app/build

FROM build AS publish
RUN dotnet publish "webapi.csproj" -c Release -o /app/publish

FROM base AS final
WORKDIR /app
COPY --from=publish /app/publish .
ENTRYPOINT ["dotnet", "webapi.dll"]
This docker file first gets the base layer image for running .netcore 5 web applications. It then sets up the environment so that the current project can be run.
Open a new terminal in visual studio code Terminal > New Terminal. Now we can build our docker container using the command docker build -t <projectname>:<version> <path to Dockerfile>. This will kick off a slew of build steps and logs.

The first build may be a bit slow but docker optimizes subsequent builds so that any step that does not need to be redone (such as downloading the base dotnetcore image) will be skipped.
Now we can finally run our docker container locally. Use the command docker run -it --rm -p <externalport>:<internal port> <projectname>:<version>. If you were following the naming used in this tutorial, that will translate to docker run -it --rm -p 8080:5000 webapi:v1. The app will now be running on your local machine at port 8080.
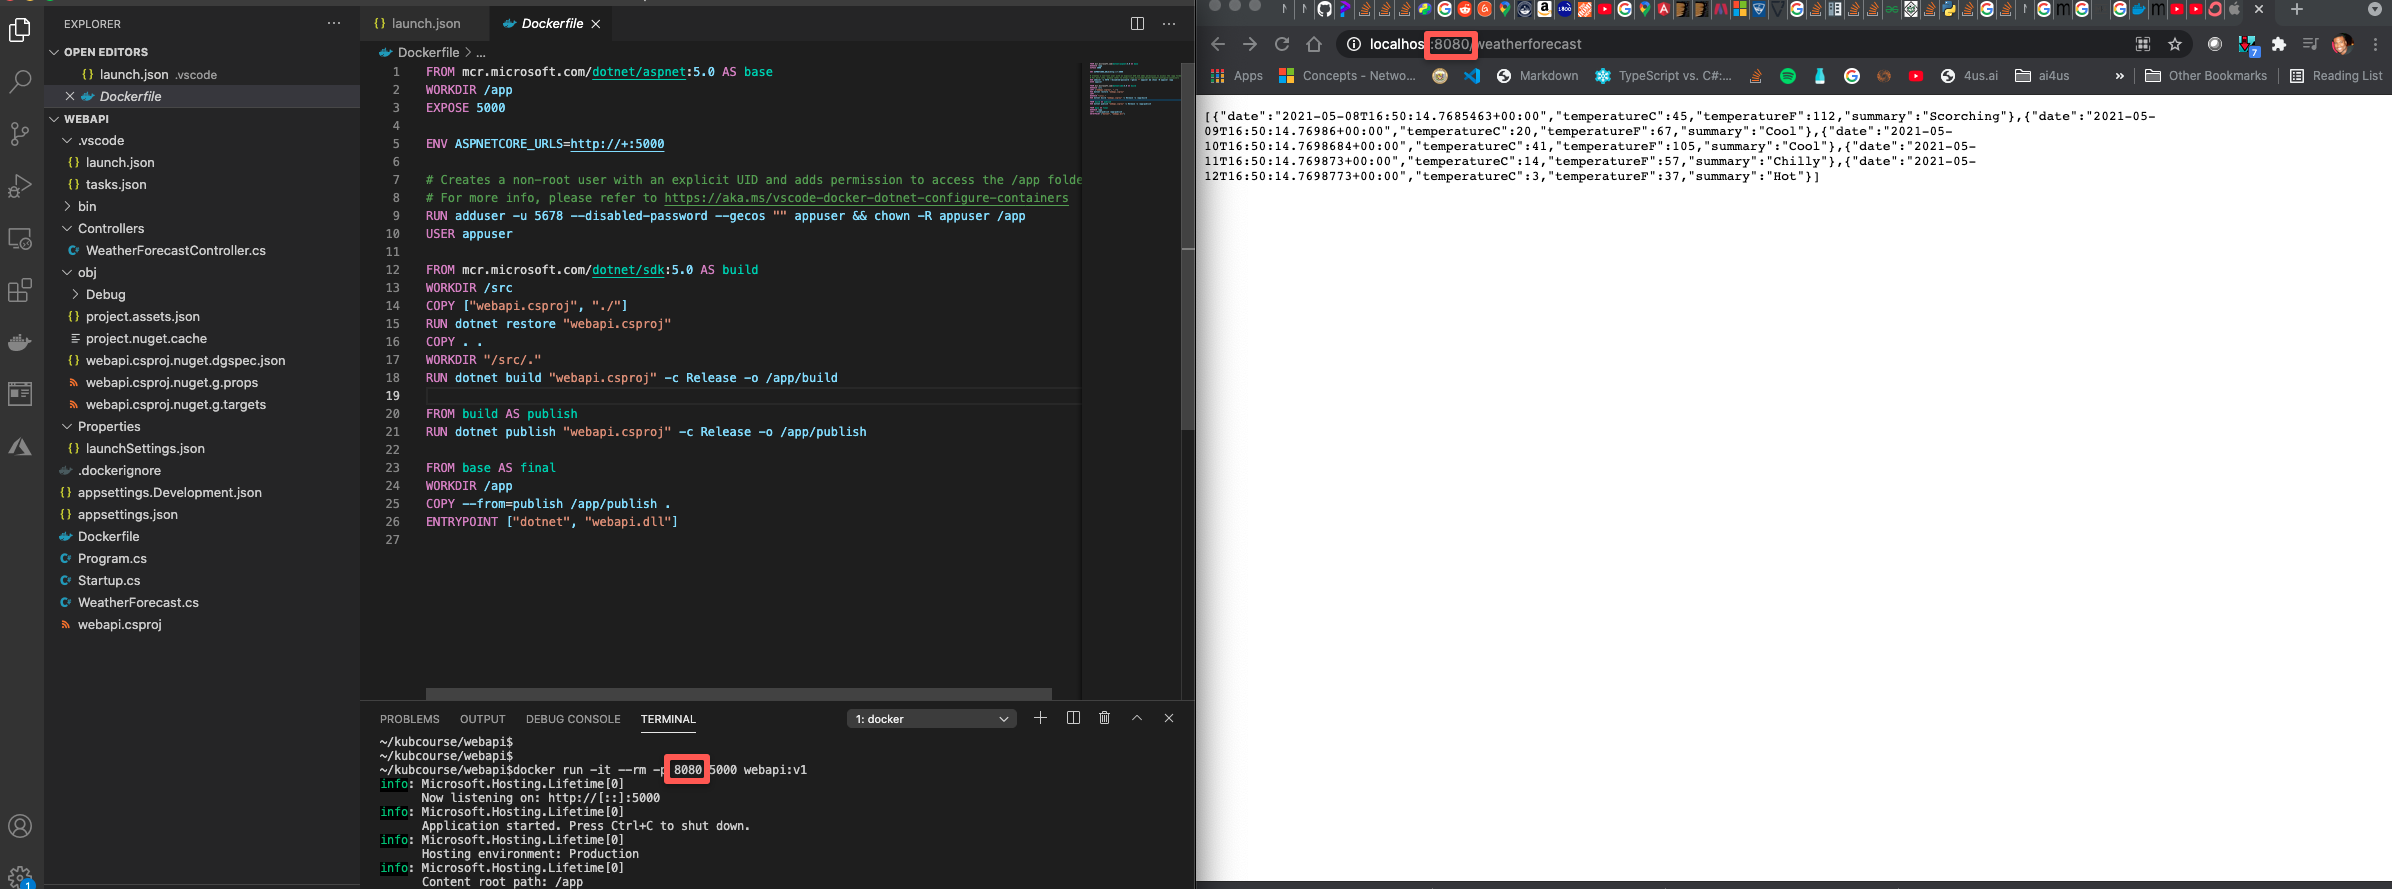
3. Iterating on your application
Dotnet core uses many best practices to define conventions for building scalable web applications. Dotnet core web APIs use Controllers to control requests coming to a web API. These Controllers serve as the starting point for functional development. In the scaffolded example, we start with a WeatherForecast controller that returns random json data. In our case, we may not want weather data or data in json format. We may simply want to return helloworld or do some complicated business logic. In order to change the functionality of your docker container, you must
- Update the controller logic
- Rebuild the docker image
- Restart the docker container
Let’s first stop the docker container with a ctrl+c in the terminal where we started the container. Now let’s go to the webapi controller webapi/Controllers/WeatherForecastController.
Let’s
- Rename the controller class to
HelloWorldController - Rename the controller file to
HelloWorldController.cs - Update the
Get()function signature to return a string - Update the
Get()function logic to simply return ‘HelloWorld’

Now rebuild and run the container
1
2
docker build -t webapi:v1 .
docker run -it --rm -p 8080:5000 webapi:v1

If you wish to add new controllers to the project, simply create the new cs files and follow the template from the original project controller.
All set!
In the next section, we will learn how to create and dockerize a webapp (UI) for our application.